Quantcast
Channel: Yarnplayer's Tatting Blog
Viewing all 419 articles
Browse latest View live

Tatting with friends at Hinsdale

$
0
0
 There were 8 of us gathered, but I only managed to get a photo of 4 of us "Tollway Tatters" together. Lace-lovin' Librarian ~ Diane has more photos on her blog!
 Diane showed us her elegant silver shuttle and a shuttle case from Janemactats.
 Diane's doily that she made from a pattern in Tatted Treasures by Jan Stawasz shown with the "Grandfather Clock" that she received from Battatter.
 Sue's beautiful dangles that she tatted onto rings and added cross charms.
Sue's gorgeous sun-catcher tatted with sparkly beads and hand dyed thread.
There were a lot more amazing things to see including some of Diane's shuttle collection and handmade bags from Barb, but these are all the pictures that I managed to take. More visiting than tatting got done today :)

Tatted "atoms"

$
0
0
 Handmade lace, beads, and science. All cool stuff.

When tatting a 6 shuttle pattern like my "atom", that's when the lesser used shuttles in a tatter's collection feel needed :)

The reason for 6 shuttles, is to allow the "orbits" of the "electrons" to cross over each other. Each orbital path is tatted as a separate chain. Only 1 pair of shuttles is in use at any one time. To minimize tangling, I've learned to keep the threads not in current use wound up onto their shuttles. I hadn't yet learned that trick at the time when I wrote up the pattern :)

The "atom" pattern is definitely not for beginners, but experienced tatters may enjoy the challenge. It's in my Up and Tat 'Em book.

By the way, it's supposed to be a Lithium atom.


Still working on the "Nouveau" tatted jewelry set pattern

$
0
0
It's much more work writing up a pattern that will make sense for others to follow, than to just tat it :) I am making some progress, though. Showing the bracelet in process. The pattern when finished, will have the necklace, bracelet, and earrings, all in the same style. Using a lot of "switching shuttles" to change direction of the chains in order to give a natural, wondering vine sort of floral effect.

Greater Milwaukee Tatting Guild, June meeting highlights

$
0
0


 Good times! Sue Anna and Barbara G. were able to join us this time, too. We heard about their experiences at the Lafayette Lacemakers "Lace Day" on Saturday, and got to see some pattern books and other goodies they had bought while there.

We tatted, chatted, and admired new patterns and latest creations.The beginners worked on mastering the "flip" of the double stitch with help and encouragement from the rest of us.

Sue Anna brought tatting in size 3 and size 20. The size of the thread sure makes a difference!


A fun, relaxing time, tatting and visiting with friends, and making new friends!
 
Sure is convenient having the meeting in the Mayfair Mall food court, where there's plenty of food available.

Nouveau Tatted Jewelry Set pattern is finished

$
0
0

Nouveau Set original tatting pattern is all done! It's for sale at my Etsy Shop and also in my Craftsy Pattern Store.

The curving, natural forms of the Art Nouveau style was my influence in designing this jewelry set of necklace with matching bracelet and earrings. To create these undulating curves in tatting, I used 2 shuttles and reversed direction of the chains frequently.

The level of pattern difficulty has been set to "advanced" and although this is definitely not a beginner's pattern, it would be an enjoyable challenge for someone already comfortable with basic tatting skills and working with 2 shuttles. There are many in-progress photos to help with unusual techniques. The pattern includes written instruction in English and diagrams.

There's a lot of possibility for thread and bead color combinations. Since the necklace structure has small motifs surrounded by a tatted framework, the small motifs can be a different color than the rest of the tatting.  In the green necklace in the picture below, I choose a bright lime green for the small motifs and a darker green for the rest of the necklace, for a shaded effect.

The pattern came out to be 11 pages, and I estimate that I put in at least 400 hours of work into the whole project of designing, tatting, photographing, diagramming, and writing.


How it went at Shake Rag Alley

$
0
0
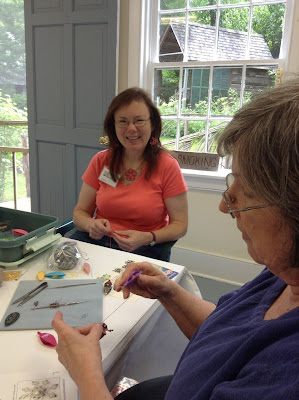
That's me in the orange shirt, teaching the intermediate class. Lovely view through the window!

Historic Potter's House where I taught classes
My weekend was a lot of fun! I taught 2 tatting classes, surrounded by beautiful natural scenery at Shake Rag Alley in historic Mineral Point, Wisconsin.

There were 5 eager learners in the beginner's class. None of them had tatted before, but after the 3 hour class, all of them were able to get their double stitches to flip - some of the time, at least!
Me carrying supplies, with the Coach House (originally a stagecoach inn) in the background

Normally, beginning shuttle tatting does NOT make for an ideal class in the time restrictions of a workshop setting, and I'll explain why:
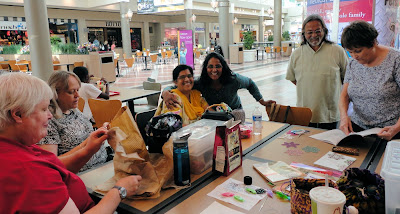
Workshop attendees tend to fit into one of the following 3 categories:
  • Those who actually want to learn the technique
  • Those who just want to socialize
  • Those who want to finish a project in class, and don't intend to pursue the craft any further
The Blacksmith Shop is near the Potter's House
Obviously, when promoting a beginning shuttle tatting class, it must be made clear in the advertising that students will NOT complete a project in class! Unlike crafts such as felting or basket making, shuttle tatting isn't something where the basics can be learned quickly and produce a cute enough project for a beginner to take home to impress family and friends. My beginners went home with a string of messy knots! A few got as far as rings.

The students said they wished my class had been all day, or even 2 days, but developing a physical skill takes a bit of practice each day. It can't be rushed, and if you work at it too hard and too long all at once, you'll just wear yourself out and get frustrated. I figure if I show them the "flip" of tatting, and they leave understanding how that works even if they can't quite do it in class, they've learned what they need to know in order to practice at home. Even if they then decide tatting isn't for them, they'll have a better understanding and appreciation of it when they see it.
A pretty creek!


 Besides the scenery and relaxed atmosphere, the other thing I like about Shake Rag Alley is they don't set outrageously high fees for their classes, unlike some other workshop locations. (For those who don't know, the teacher receives only a percentage of the workshop fee, the rest goes to the organization that runs the location.) 

Hopefully, my students felt like they got their "money's worth" out of my classes!


Bridge on nearby trail

Close-up of a day lily in the gardens

Ellery House at Shake Rag Alley

Photos from Greater Milwaukee Tatting Guild

$
0
0

 Always a good time getting together with tatting friends and making new friends!


Our newest arrival showed up saying she'd never tatted, then showed me a chain of correctly made double stitches already done! So, I told her she'd already figured out the hard part by herself - wow! I then demonstrated how to tat rings and join them.

Sue Anna was wearing a pendant made from the "Rotation" pattern and had started another one in blue.

Barbara G. had finished a motif from Jon Yusoff's book, "Elegant Tatting Gems" and was working on another. She said the variegated thread helped with figuring out the patterns better. Later she'll try them in solid colors.


 Khomi arrived with a doily in progress, in a pretty purple and green variegated thread.

We all took a break to watch one of Karen Cabrera's tatting videos, the one on Hyperbolic Tatting. Interesting ideas to try someday!


Ana explained about how 2 pairs of glasses help her with close work. Normally, she only wears reading glasses, but when doing handwork she puts on another pair with a stronger magnification, and where the 2 lenses intersect it's like a super magnifying glass. So, 3 stages of magnification to choose from depending on what the project requires at any particular stage, sort of like triple bifocals but even better.

Double Flower Using Celtic Shuttle

$
0
0
 A simple flower idea, tatted with a bead in the center., with an extra row of petals, interlocking Celtic style.


This green Celtic shuttle was acquired from Handy Hands Tatting.


Continue tatting, bringing each chain under and through before each lock join.


Giveaway! Book and Hand Dyed Thread

$
0
0

Giveaway!
Comment on this blog post for a chance to win Iris Niebach's new book Tatting Fantasia 4, plus 2 skeins of my own hand dyed thread! The thread is size 20, from my "Sugar Maple" and "Summer Trail" batches.

If you have a blog, that's okay for contact info, otherwise I'll need your email address or some other way for me to contact you if you win.

Will leave this post open for commenting until Tuesday, July 23, then I'll use a random number generator to choose the lucky winner! Please only comment once - duplicates will be removed.

And the winner is ... Anza!

$
0
0
Congratulations, Anza! You're the lucky winner of Iris Niebach's new book Tatting Fantasia 4, and 2 skeins of my hand dyed thread! You'll be getting an email from me soon.

Thank you to everyone who entered the giveaway contest, I've enjoyed reading the comments. You're all the nicest people! If you didn't win this time, there's always another chance in another giveaway in the future.

Filigree earrings

$
0
0
Its fun to tat around the metal filigrees that are readily available now from bead shops. Just a few simple rings and chains, joined into the holes of the filigree, and you've got a unique pair of earrings.

For the pair above, I used brass diamond shaped filigrees that measured 15mm across (a little over 1/2 inch). The thread was Lizbeth size 20 in Herbal Garden. I strung 15 size 11/0 Delicas onto the thread, putting 12 of them on the shuttle thread, and 3 on the ball thread.

I started with the top center ring.
R 2-2-2, join to filigree, 2-2-2. RW.
Ch 2-2-2-2-2-2. RW.
R 4, join to filigree, 4. RW.

Ch 4, [slide up a bead from the shuttle, 1] 2 times, then slide up the 3rd bead, 4. Lock join to filigree.
Ch 7. Lock join to filigree.

This is the basic pattern. The way it's arranged and repeated can be seen in the photo. At the bottom I used the 3 beads that were on the ball thread, to dangle from a picot at the bottom, between the chains.

This is just to give an idea of what might be done. There are many possibilities!

Tollway Tatters Summer Fun

$
0
0
The Tollway Tatters get-together at Hinsdale included special guests Tatting Marie and Lace-lovin' Librarian Diane's mother and sister.

Sue Anna can be seen on the left corner of our table laden with tatting goodies, Barbara Gordon on the right.

A doily in progress, tatting by Barbara

Tatting in progress by Sue Anna

Some of Diane's thread collection

Beautiful tatted bag by Marie

More of Marie's amazing work

Some of Diane's pretty doilies. The white cotton center was purchased from Handy Hands.

Lovely handmade gifts from Marie!
The time passes so quickly with tatting friends! I was sorry when it was time to go. But, on Monday, August 12, there will be a meeting of the Greater Milwaukee Tatting Guild, so more fun with friends to come!

Greater MIlwaukee Tatting Guild, fun with friends

$
0
0
Me wearing tatted flower hair clip
 A nice relaxing time was spent at the Mayfair Mall food court, tatting, looking at pattern books, admiring tatted works, visiting with tatting friends, and meeting new friends!

Khomi brought visitors from India. They were very interested in how I add beads to tatting, so I gave some demonstrations. I explained that I learned most of the techniques of adding beads to tatting from the website of Jane Eborall!

My large red tatted flower hair clip and red tatted earrings called for a profile photo of me :)

Tatting by Sue Anna
Sue Anna brought more of her beautiful completed pieces to admire: a Spinning Wheel mat from the pattern by Mary Konior, a Rotation pendant in red, white, and blue, earrings from the Nouveau set pattern, and more. She also had another Spinning Wheel mat in progress, in hand dyed thread from the Sugar Maple batch.
Barbara G. brought more of her beautiful work, that we had seen at the Tollway Tatter's meeting the previous week - but I didn't get photos of it either time, aw, shucks!

Ana worked on a Wondrous Window pendant from my Up and Tat 'Em book.
Sue Anna's work in progress

Chocolate was available in plentiful supply, courtesy of Sue Anna :)

Ana
Barbara

Tatted Feather Earrings

$
0
0

So far this is the best feather design that I could come up with using tatting. I've been thinking about feathers the last few weeks (can you say, "feather-brained"...lol). But, I like the feather-y effect of the folded rings, the beads down the center that accentuate the center rib, and the natural look of having one side slightly larger than the other. The picots at the base of the feather could be cut and frayed, for a downy look, but I chose to leave them uncut, thinking that with wear they would hold up better. What do you think?

Martha Ess has done a very nice tutorial on folded rings.

Still designing a tatted feather and a "tribal" necklace in progress

$
0
0

It's not so much that a creative mind is disorganized, it's that the planet spins around too quickly. That's the reason I can't get more projects finished. The odd-looking mess of beads, paper clips, and hand dyed thread in the above photo is a new original design in progress, that will have a primitive, rustic, or tribal look when completed. Making tatting look "primitive" rather than the usual "Victorian" is hard! I'm using some tricky techniques such as Catherine Wheel Joins and Loop Tatted Rings to get my design to work, and I'll show you the completed necklace when I get it done.

I've done a little more on the feather idea as well, and I think I may have a workable picot-ed version. I do plan to write up the feather pattern at some point in the future, but I'm hoping that a third feather inspiration comes along first.

For those who mark their calendars well in advance, I'll be teaching a day-long workshop on beginning tatting at Shake Rag Alley on May 31, 2014. It's a pretty location with major tourist attractions nearby, and Shake Rag Alley sets their class fees to be quite reasonable, when compared to other workshop events. Other attractions in the area include House on the Rock, Frank Lloyd Wright's Taliesin, and Wisconsin Dells.

Besides hand dyeing a batch of Knitty Gritty, I also tried dyeing a small experimental batch of "Sumac". At first I planned to call it "Angry Martian" because I was "very angry, very angry indeed" at the time, but when it turned out so pretty, my mood improved and I changed the name to Sumac, which is a common shrub around here that has cheerful, bright colors in autumn.

Primal Pods

$
0
0
 Inspired by jewelry styles of antiquity, I attempted to achieve tubular shapes in tatting for the main motif of this necklace. They seemed to resemble pods or seeds to me, and since I was aiming for a primitive look, the title of "Primal Pods" seems appropriate for this design.

The dangling long beads at the bottom are held in place with Loop Tatted Rings. 11Frivole has made a very good video to show how to do the Loop Tatted Ring.

The rest of the necklace used techniques such as a bead inside a ring, Josephine Chains, and I also encircled a ring around a chain. To tat a ring that encircles a previously tatted chain you need to plan for it by wrapping the thread around the chain twice before winding the shuttle. Similar to the way that I put a ring around a metal split ring jewelry finding before I discovered split ring pliers - and of course the pliers can't be used in this instance.

All in all, it seems that to make tatting look "primitive" some highly sophisticated techniques need to be used. But, I enjoyed the practice, and I'm pleased with how the design turned out. It's not a style that will appeal to everyone, but it's definitely unique.

Playing with "Fire" hand dyed thread

$
0
0
"Fire"
When a search though my stash turned up no solid orange thread, I decided to dye some myself. My scruffy little dye sample book contained both a bright orange and a slightly under-ripe tomato red-orange from previous experiments, so I went with each of those as a solid color, then combined them in one colorway that I called "Fire". Yes, it's bright enough, but the shading is very subtle, some people might mistake the "Fire" batch for a solid color. The shading does show up when it's tatted, though, as can be seen in the earrings in the top photo. By the way, the pattern for those earrings is my own "Small Narrow Leaf" pattern.

Greater Milwaukee Tatting Guild keeps growing

$
0
0
6 of the guild members
 It seems that this guild will keep growing, which is a good thing because not everyone can come to every meeting. A different bunch with each gathering, but it seems that everyone enjoys the tatting time together. I know I do!

The photos show just a glimpse of the lovely tatting items brought for show and tell. We had one brand new tatter getting her first lesson, and she caught on very quickly. She said that her experience doing macrame may have helped.

Somebody gave me the "sad puppy eyes" when I showed another new design in progress, because "you still haven't written up your boomerang pattern". Yeah, well...writing is work :) It's more fun to tat - especially with friends!
Gail's tatted notecards

Tatting Lace by T. Fujito

Shuttle from Tat's Heaven and Brooch from Jane Eborall

Sue Anna's snowflakes from Jon Yusoff's book, Tatted Snowflake Collection

I feel a book coming on

$
0
0

Yes, I've got enough original designs started that I could do another pattern book. 

In the last few days I spent many hours choosing background color, thread colors, shuttle color, and lighting conditions for a series of "how-to" photos for that section of the book. Sample is photo at left. Not great, but it'll have to do. If I lose momentum with this big project, I'll lose interest and it won't get done at all.

Most likely self-publish, that way I can sell the digital file. But, I gotta admit that it was cool seeing my Tatted Jewelry book on the shelves at Hobby Lobby!


Some progress in designing the new book - it broke the camera

$
0
0
So far I have 9 pages with something on them, for the next tatting pattern book that I'm writing.

But, I haven't even gotten to the patterns, yet! The 9 pages so far include the cover and basic tatting how-to review with many photos. It involved lots of demo time behind the tripod of my camera, taking many shots using self-timer and hoping that at least some of them would come out in focus! A less-than-stellar example is shown above.

Was nearly done with that demanding section of the book, too, when this morning my camera stopped working - oh no, not now. I can't do my work without a decent camera, so off to buy a new one. Fortunately the salesman on duty was actually a knowledgeable professional photographer and was able to show me the camera to exactly fit my needs and budget. I was all done camera shopping in less than half an hour.

The new camera has more megapixels and other fancy stuff that should take better photos than my old one did. But I'm NOT going to retake all those basic tatting how-to photos, no way...they'll just have to do. I expect to be able to take nice "glamor" shots of the projects with my new camera, though! Oh, by the way, the projects for the book will all be beaded tatting.
Viewing all 419 articles
Browse latest View live